Manual Installation
- Open your SharePoint Management Shell as an admin;
-
On the console, go to the path where the Install.yourthemenamePackage.ps1 script is.
Note: It's usually located in C:/Downloads/"yourthemename".SP2016/FarmSolution;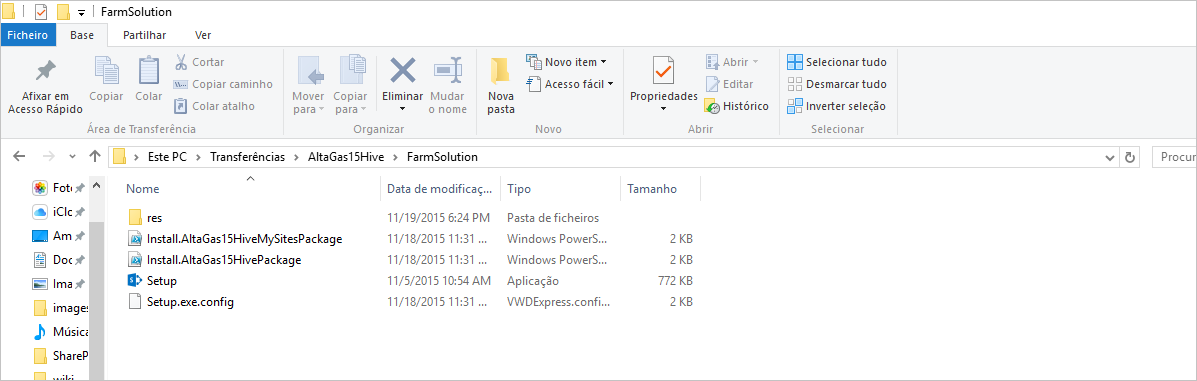
-
Once inside the folder, you can just insert the command
.\Install.yourthemenamePackage.ps1. If the Execution Policy Change appears, accept it; - At this point different options will appear. Choose Option 1 to install the theme and hit enter;
- Your theme is now being installed!
Once this is done you will see a message letting you know the theme was successfully installed. ✅
Check if the Theme was installed
Before moving on to activating the theme, let's confirm if the theme was successfully installed.
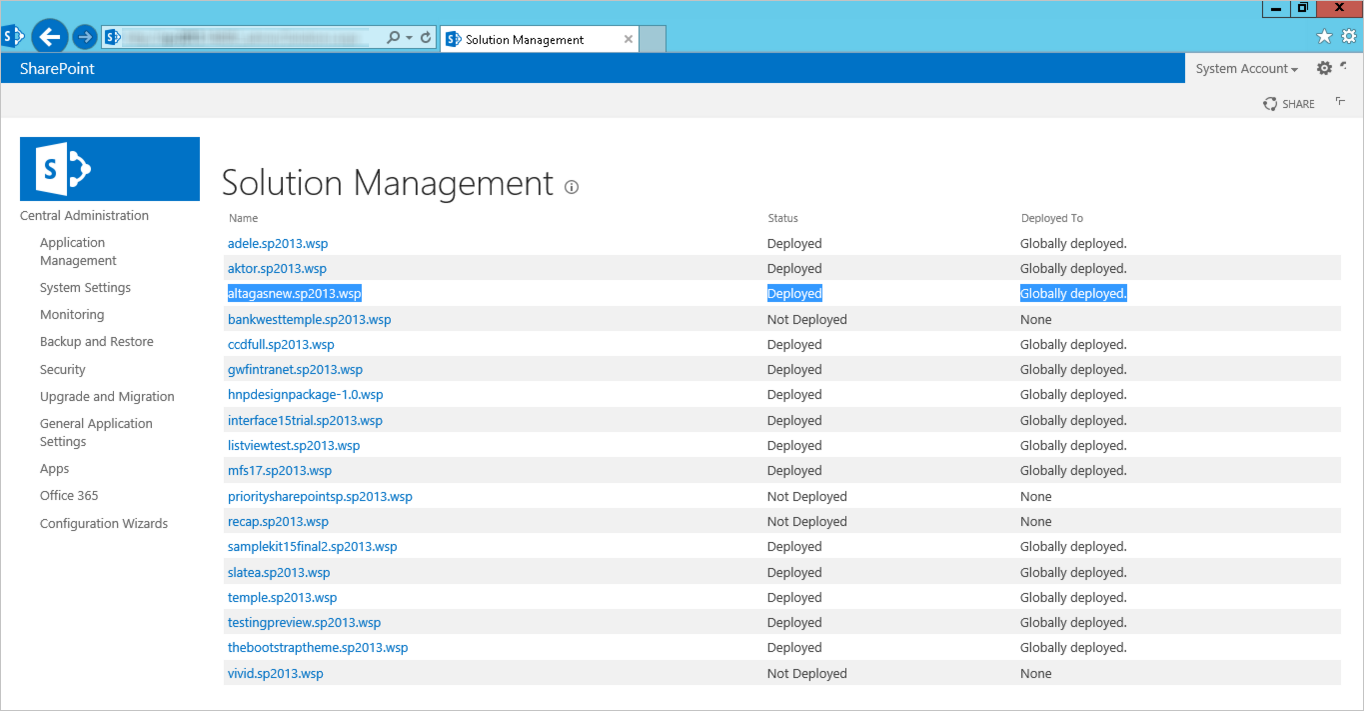
- Access your SharePoint Central Administration;
- Click on System Settings and open Manage Farm Solutions.
You can also enter your Solutions Management with this path: http://[central_administration_url]/_admin/Solutions.aspx
If the theme was successfully installed, the Status tab should display Deployed, and the Deployed to tab should display Globally Deployed.
Theme installed! ✅
Activate the theme
After confirming the theme was successfully installed, it has to be activated:
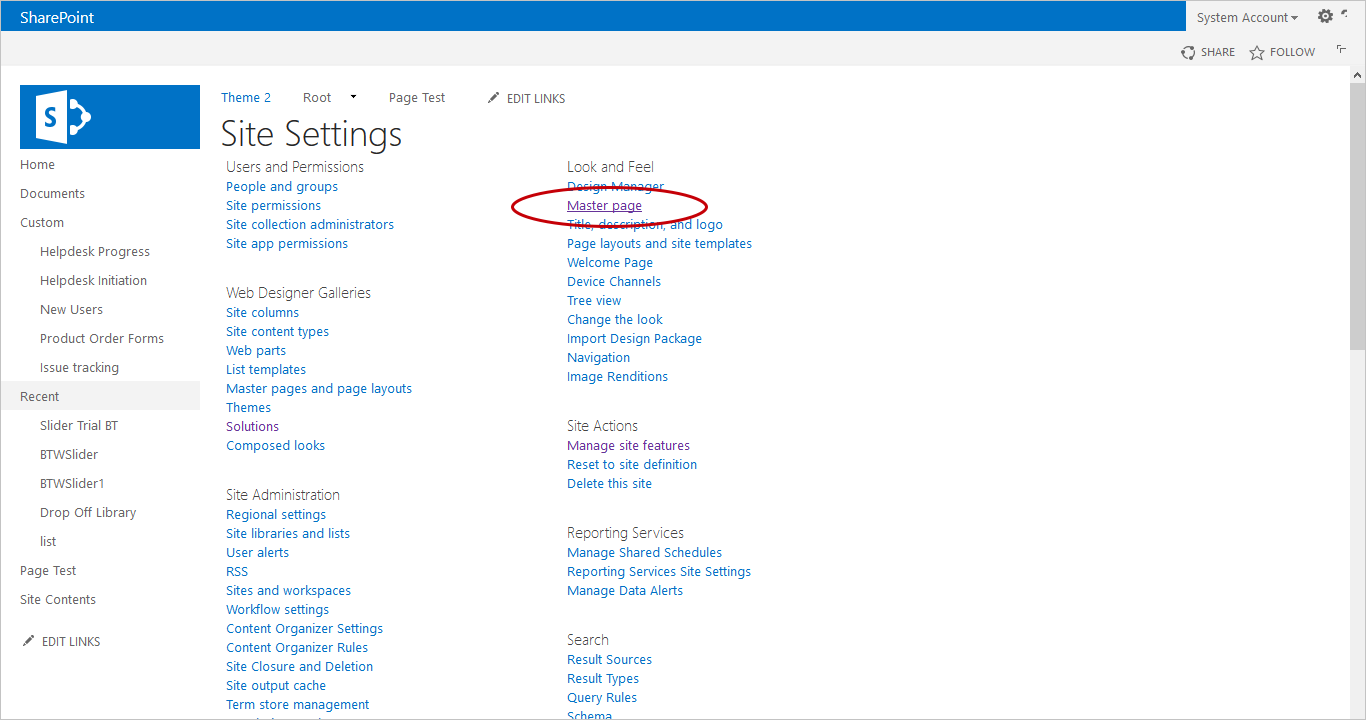
- Click on Settings ⚙️ and then Site settings;
- Under Site Actions, click on Manage Site Features;
- Select your theme and click on Activate.
Theme activated! ✅
Set the master page
The final step is to change your current master page to one of the theme's master page.
- Click on Settings ⚙️ and then Site settings;
-
Under Look and Feel, click on Master page;
-
Choose the master page you want to apply. Your theme's master pages starts by yourthemename;
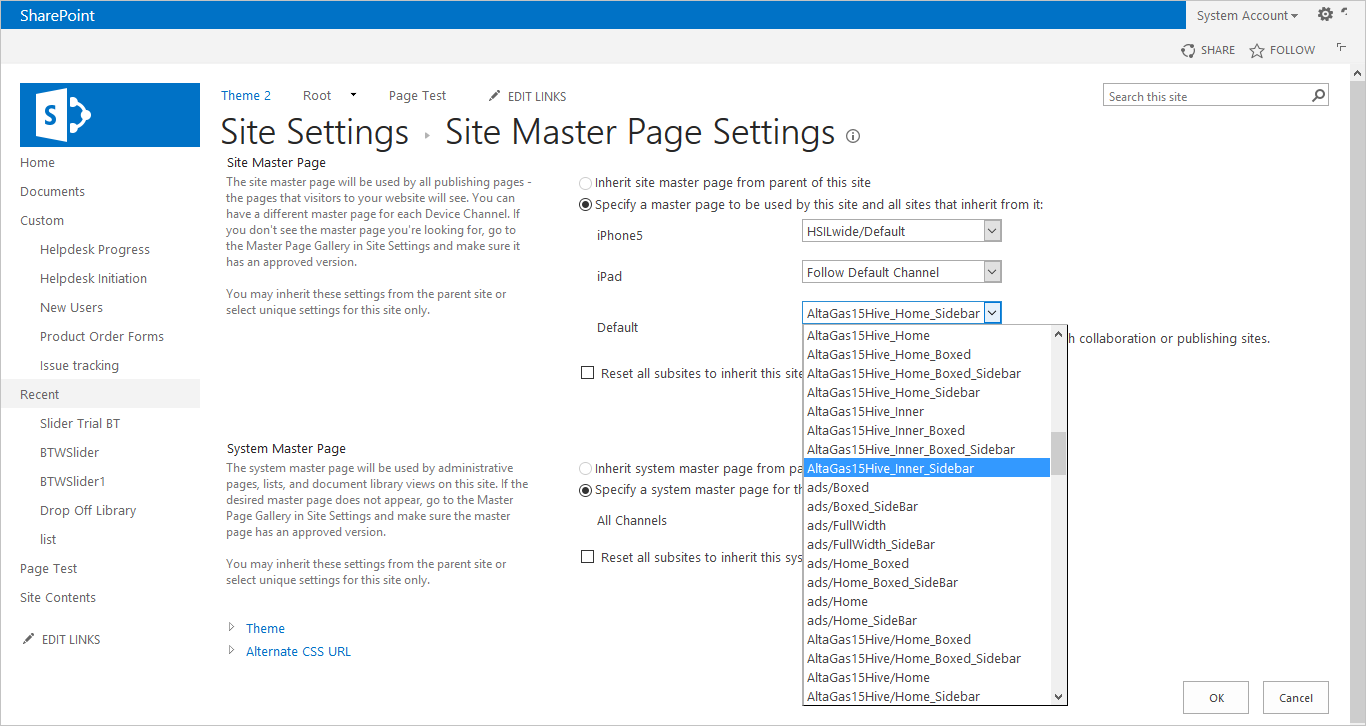 4. Click Ok.
Master Page set! ✅